
1. About this guide
The Pre Check-In Portal lets guests complete their check-in details online before they arrive. Guests confirm their booking, enter their details, add a photo ID, list anyone else staying with them, and sign the hotel’s terms and conditions. Everything they enter is saved straight into GuestCentrix, so the front desk has it ready on arrival.
This guide has two parts:
- For guests (sections 3 to 11): what a guest sees and does at each step. Front desk and reservations staff can use these sections to help guests over the phone.
- For the hotel (sections 12 to 14): what is saved in GuestCentrix, the settings your administrator can change, and answers to common questions.
All screenshots use demonstration data. Names, contact details, booking numbers and the “DEMO” logo are examples only; your portal shows your own hotel logo, name and terms.
2. What’s new in this release
Feature | What it does |
|---|---|
Property selection | Groups with more than one hotel get a landing page listing each property. Guests pick their hotel to start; single-property sites go straight to that hotel. |
Refreshed design | A cleaner look that matches GHub, with light, dark and high-contrast themes, and layouts that fit phones and tablets. |
Photo ID | Guests take or upload a photo of their passport, licence or ID card. The portal checks the photo is clear, turns it upright and trims it before saving. |
Additional guests | Guests can list people staying with them who are not yet on the booking. The names are added to the booking’s check-in comments. |
Signed name | The primary guest’s name appears under the signature, on screen and in the saved copy. |
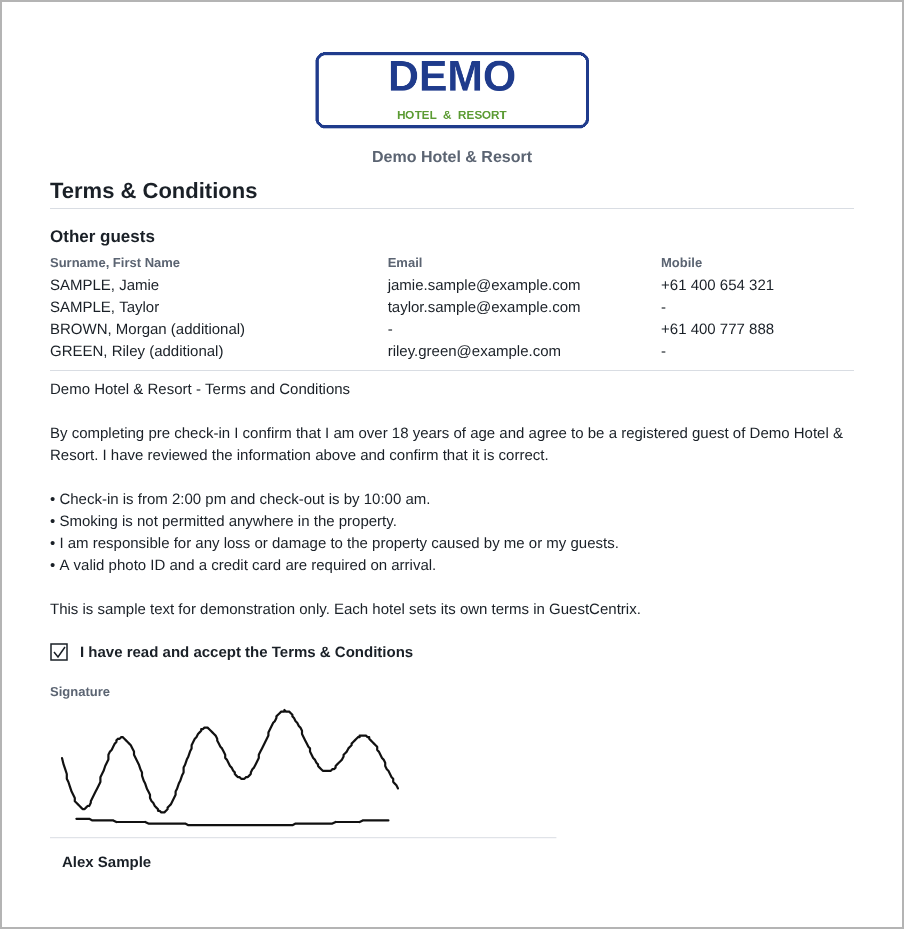
Full terms and conditions copy | The hotel can save a picture of the whole signed terms and conditions screen, including the hotel logo, the other guests and the signature, as the folio attachment. |
Date of birth checks | Future dates cannot be chosen, and the calendar opens 18 years back to make adult dates of birth quicker to pick. |
Email checks | Email addresses must be correctly formatted before the guest can continue. |
Regional formats | Dates follow the guest’s own region (for example, day/month/year for UK browsers), and one set of terms per language covers every region. |
Booking status check | Bookings that are not in a state to be pre checked in show a clear message instead of opening. |
Branding option | The CMS Hospitality / GuestCentrix branding can be hidden for a fully white-labelled portal. |
3. Getting to the portal
Guests can reach the portal in two ways: from their own personal pre check-in link, or by opening the portal and searching for their booking.
i. Personal pre check-in link (PURL)
Every booking has its own personal link, known as a PURL (personalised URL). The link opens that guest’s booking directly, so they do not need to search for it and go straight to the guest details step (section 5).
- Sent automatically by GuestCentrix EMS. The PURL can be included in your pre-arrival emails from GuestCentrix EMS, so every guest receives their link automatically before they arrive, with no work for the front desk.
- Unique to the booking. Each link opens only the booking it was created for. Guests cannot see or change anyone else’s booking.
- Opens in the guest’s language. The link carries a language, for example /en/ for English, and the guest can still change language in the portal.
- Group bookings. For a group booking, the link opens the group so the organiser can complete pre check-in for each room.
- Status checked every time. If the booking is no longer in a status that can be pre checked in, for example it has been cancelled or the guest has already checked in, the link shows a message instead of opening the booking (section 10).
A PURL looks like this, with your own portal address and a unique code for the booking:
https://<your portal address>/en/1A2B3C4D-5E6F-4A7B-8C9D-0E1F2A3B4C5Dii. Opening the portal directly
Guests who do not have their link can open the portal address themselves. In that case:
- If your group has more than one property, the portal opens on a property list. The guest selects the hotel they are staying with.
- If there is only one property, the portal opens that hotel’s reservation search straight away.
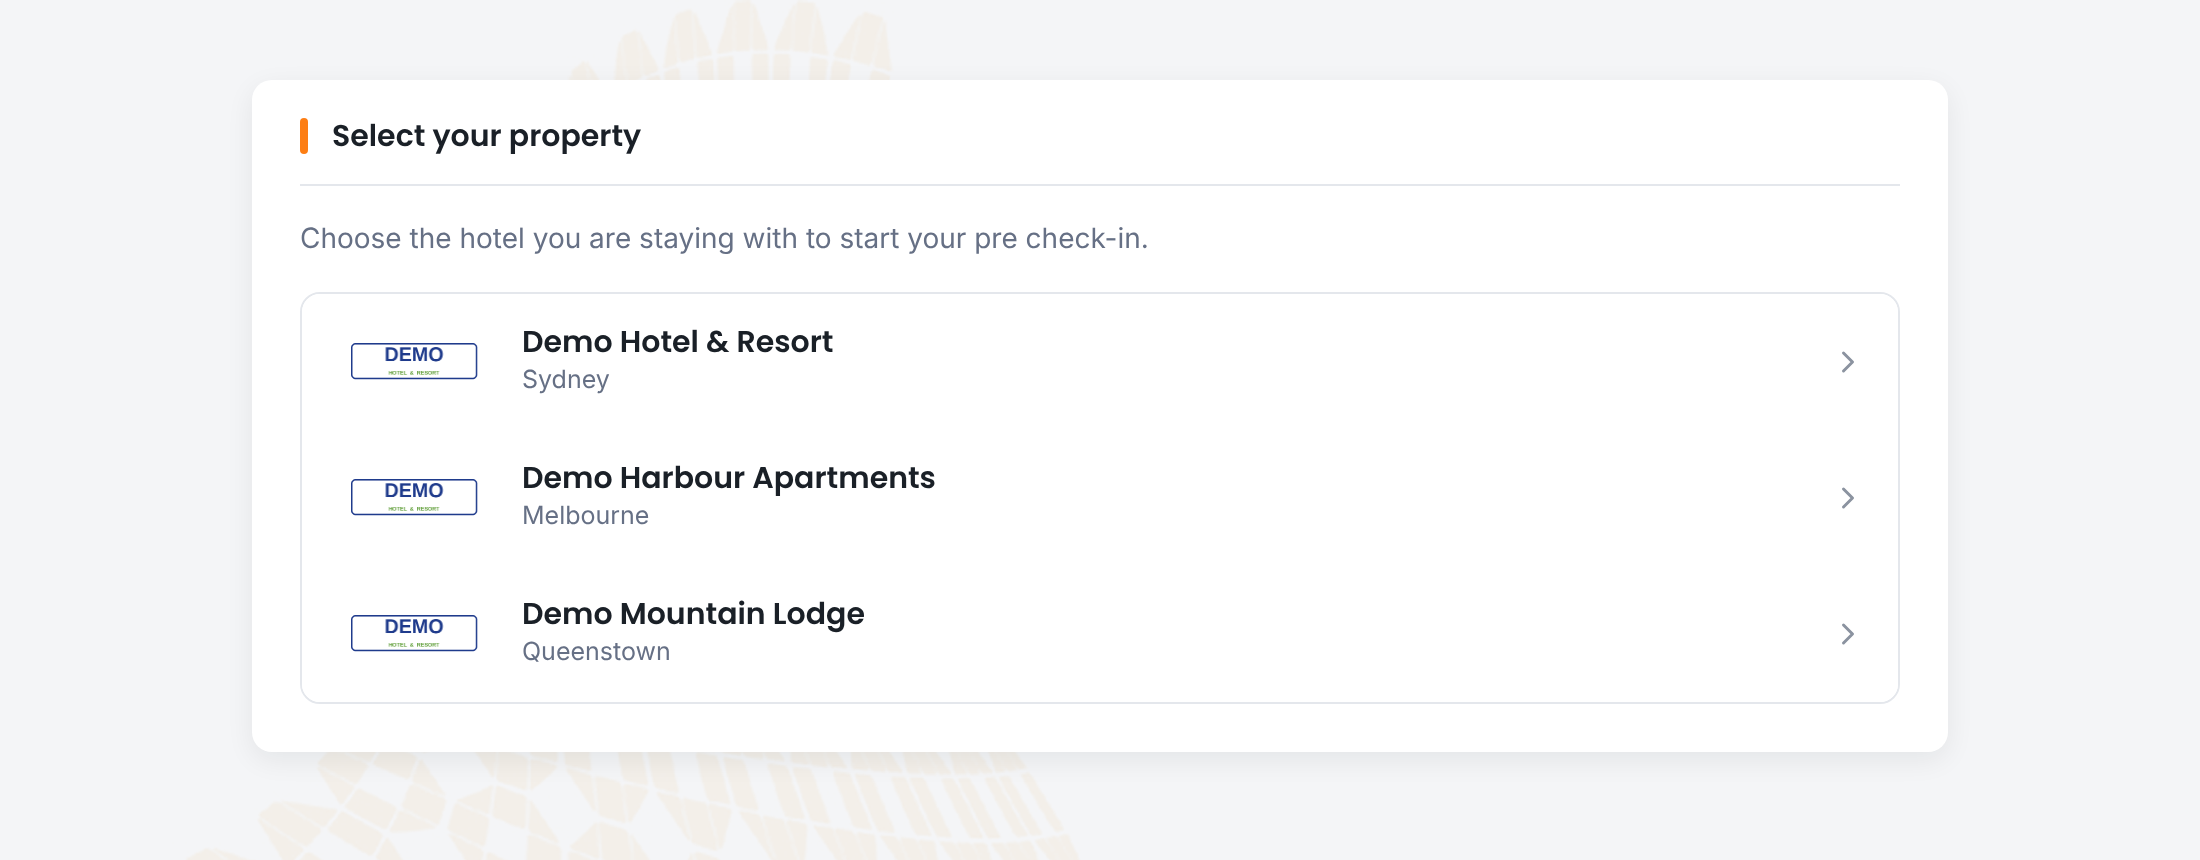
Each property shows its own logo and location. Selecting a property opens its reservation search (section 4).
4. Finding a reservation
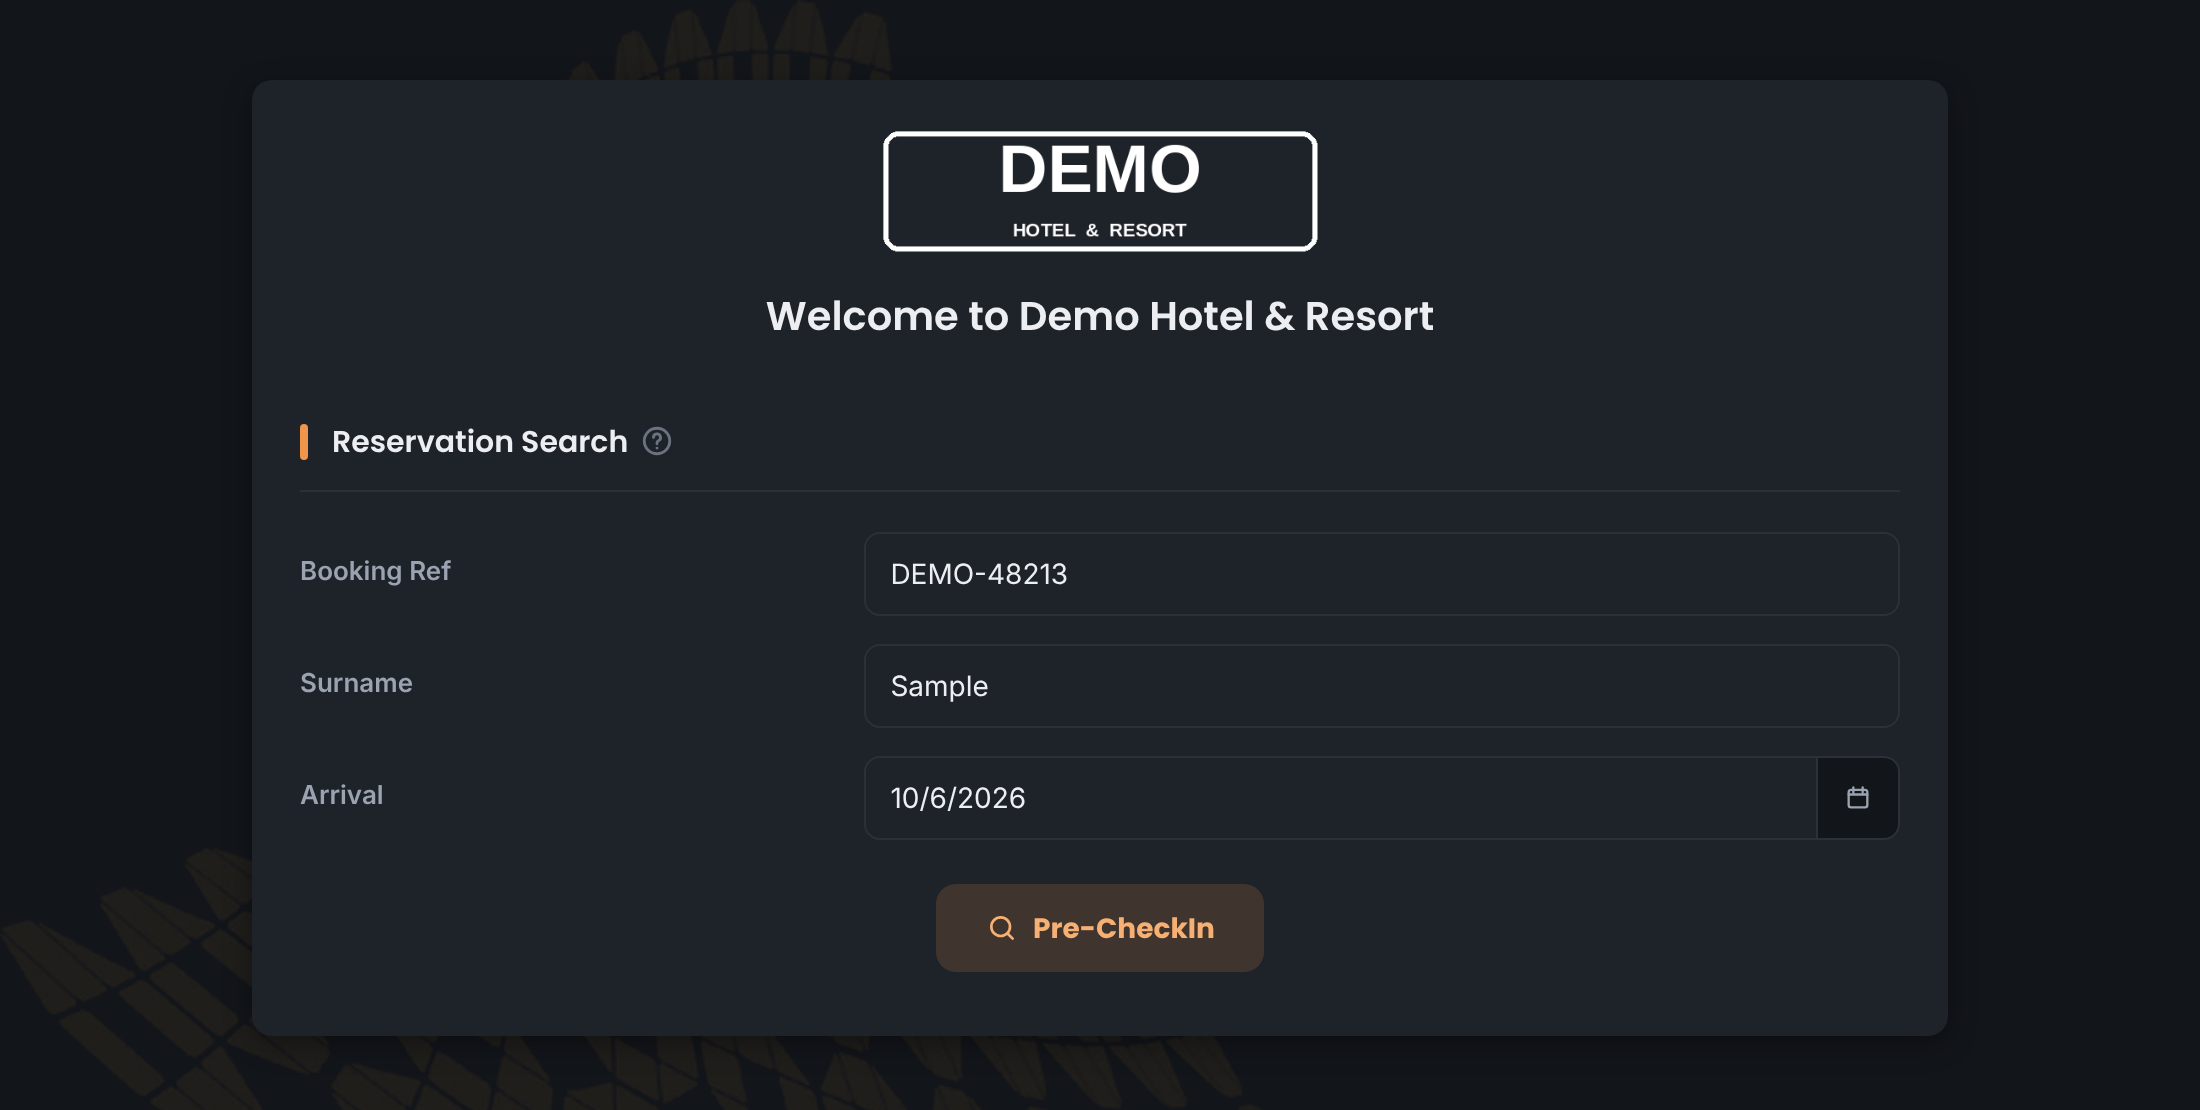
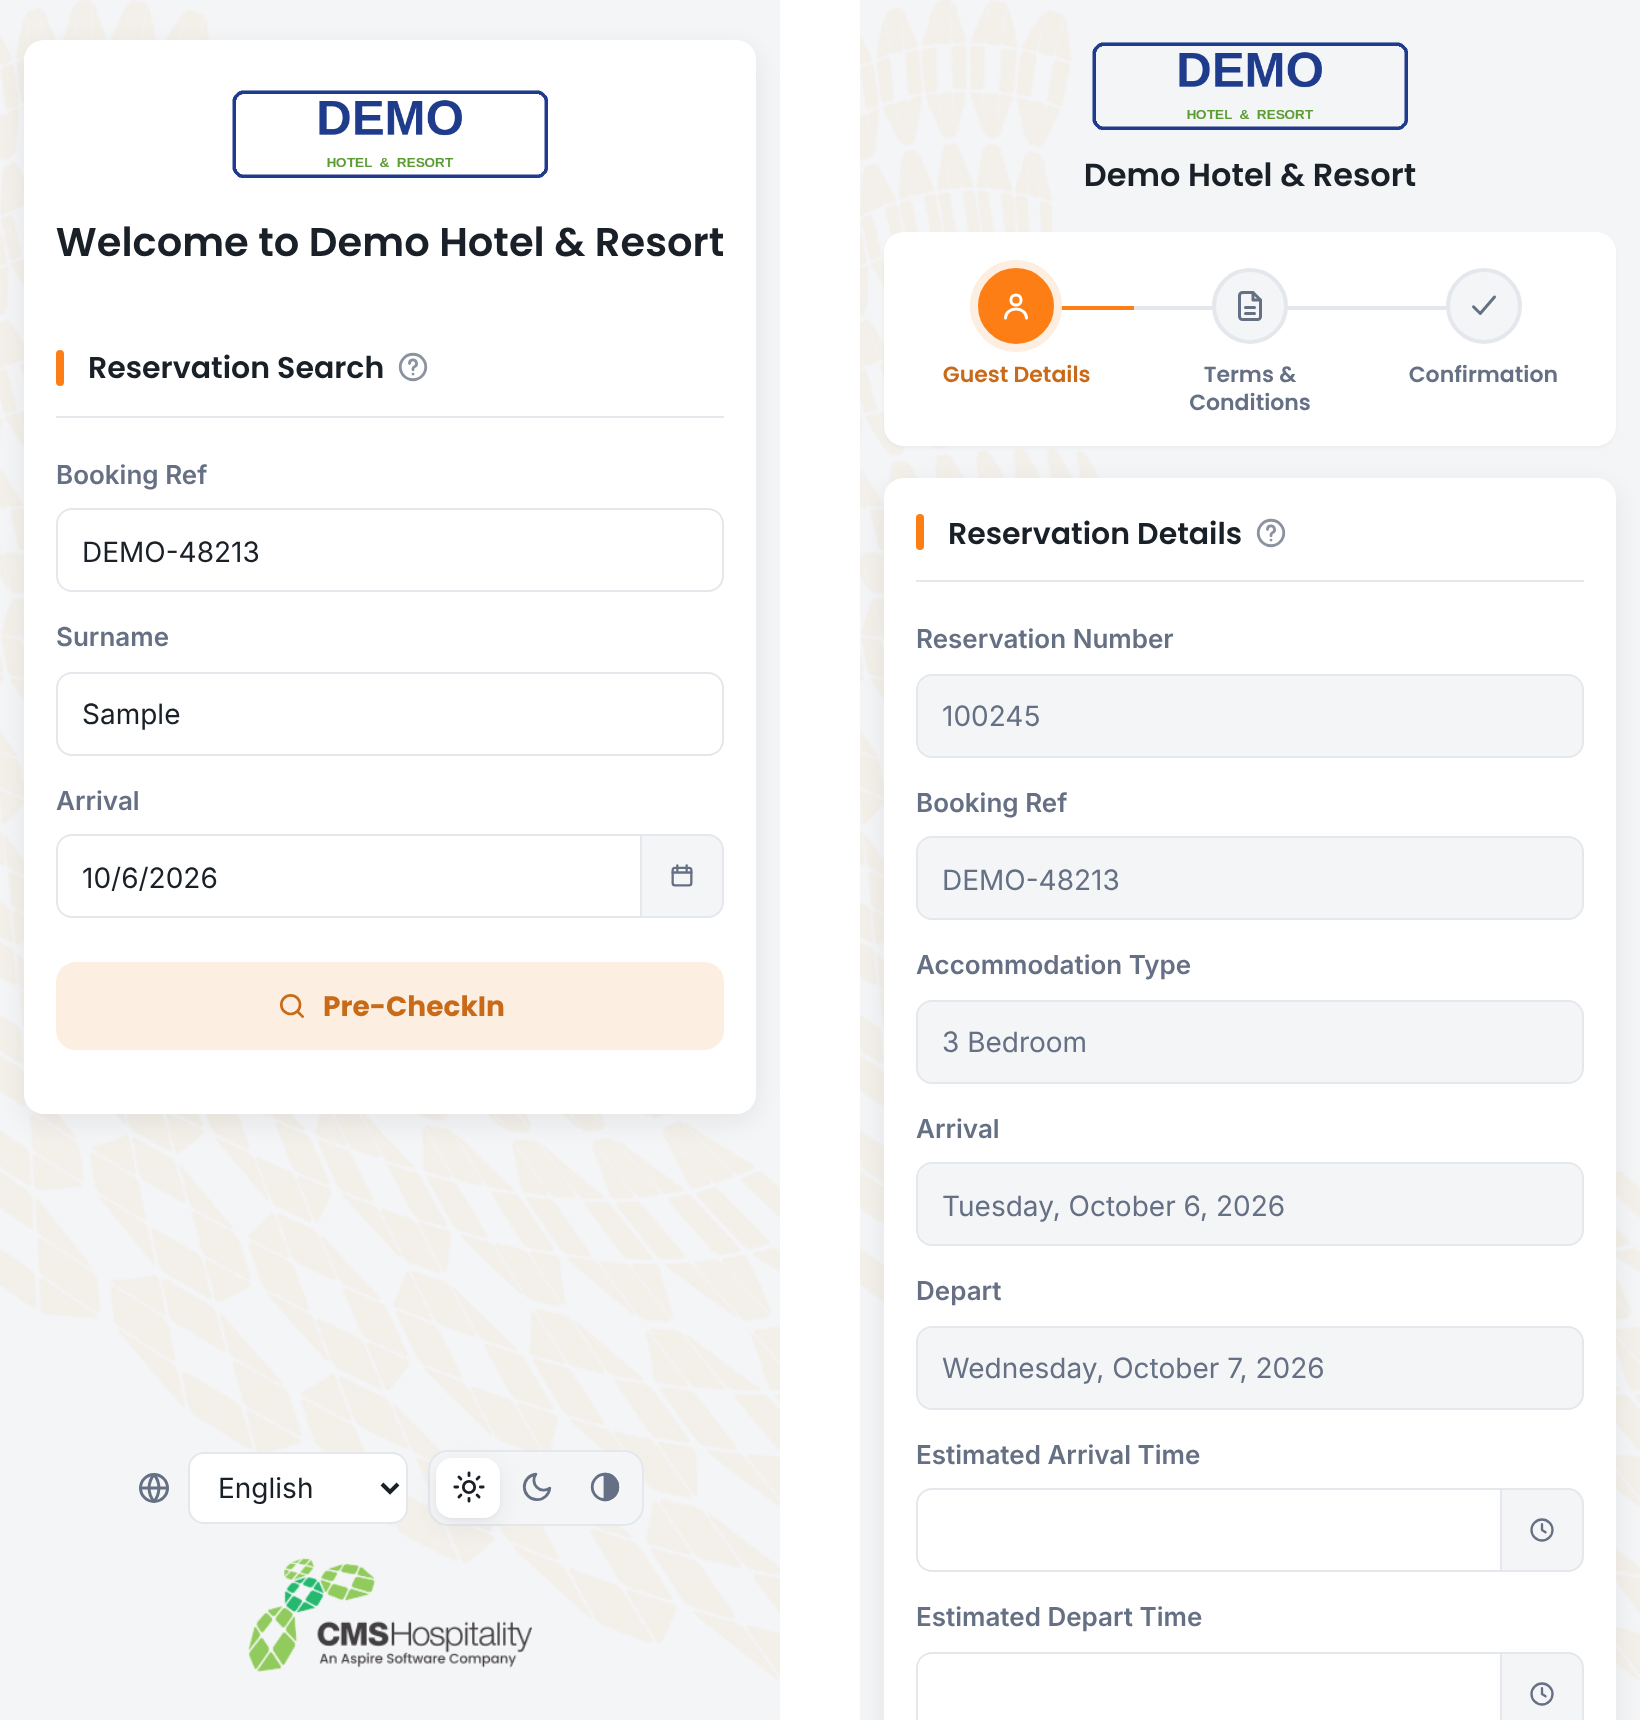
The reservation search shows the hotel logo and a welcome message. The guest enters three details from their booking:
- Booking Ref: the booking reference from their confirmation.
- Surname: the surname the booking is under.
- Arrival: the arrival date. Type it or pick it from the calendar.
- Select Pre-CheckIn to open the booking.
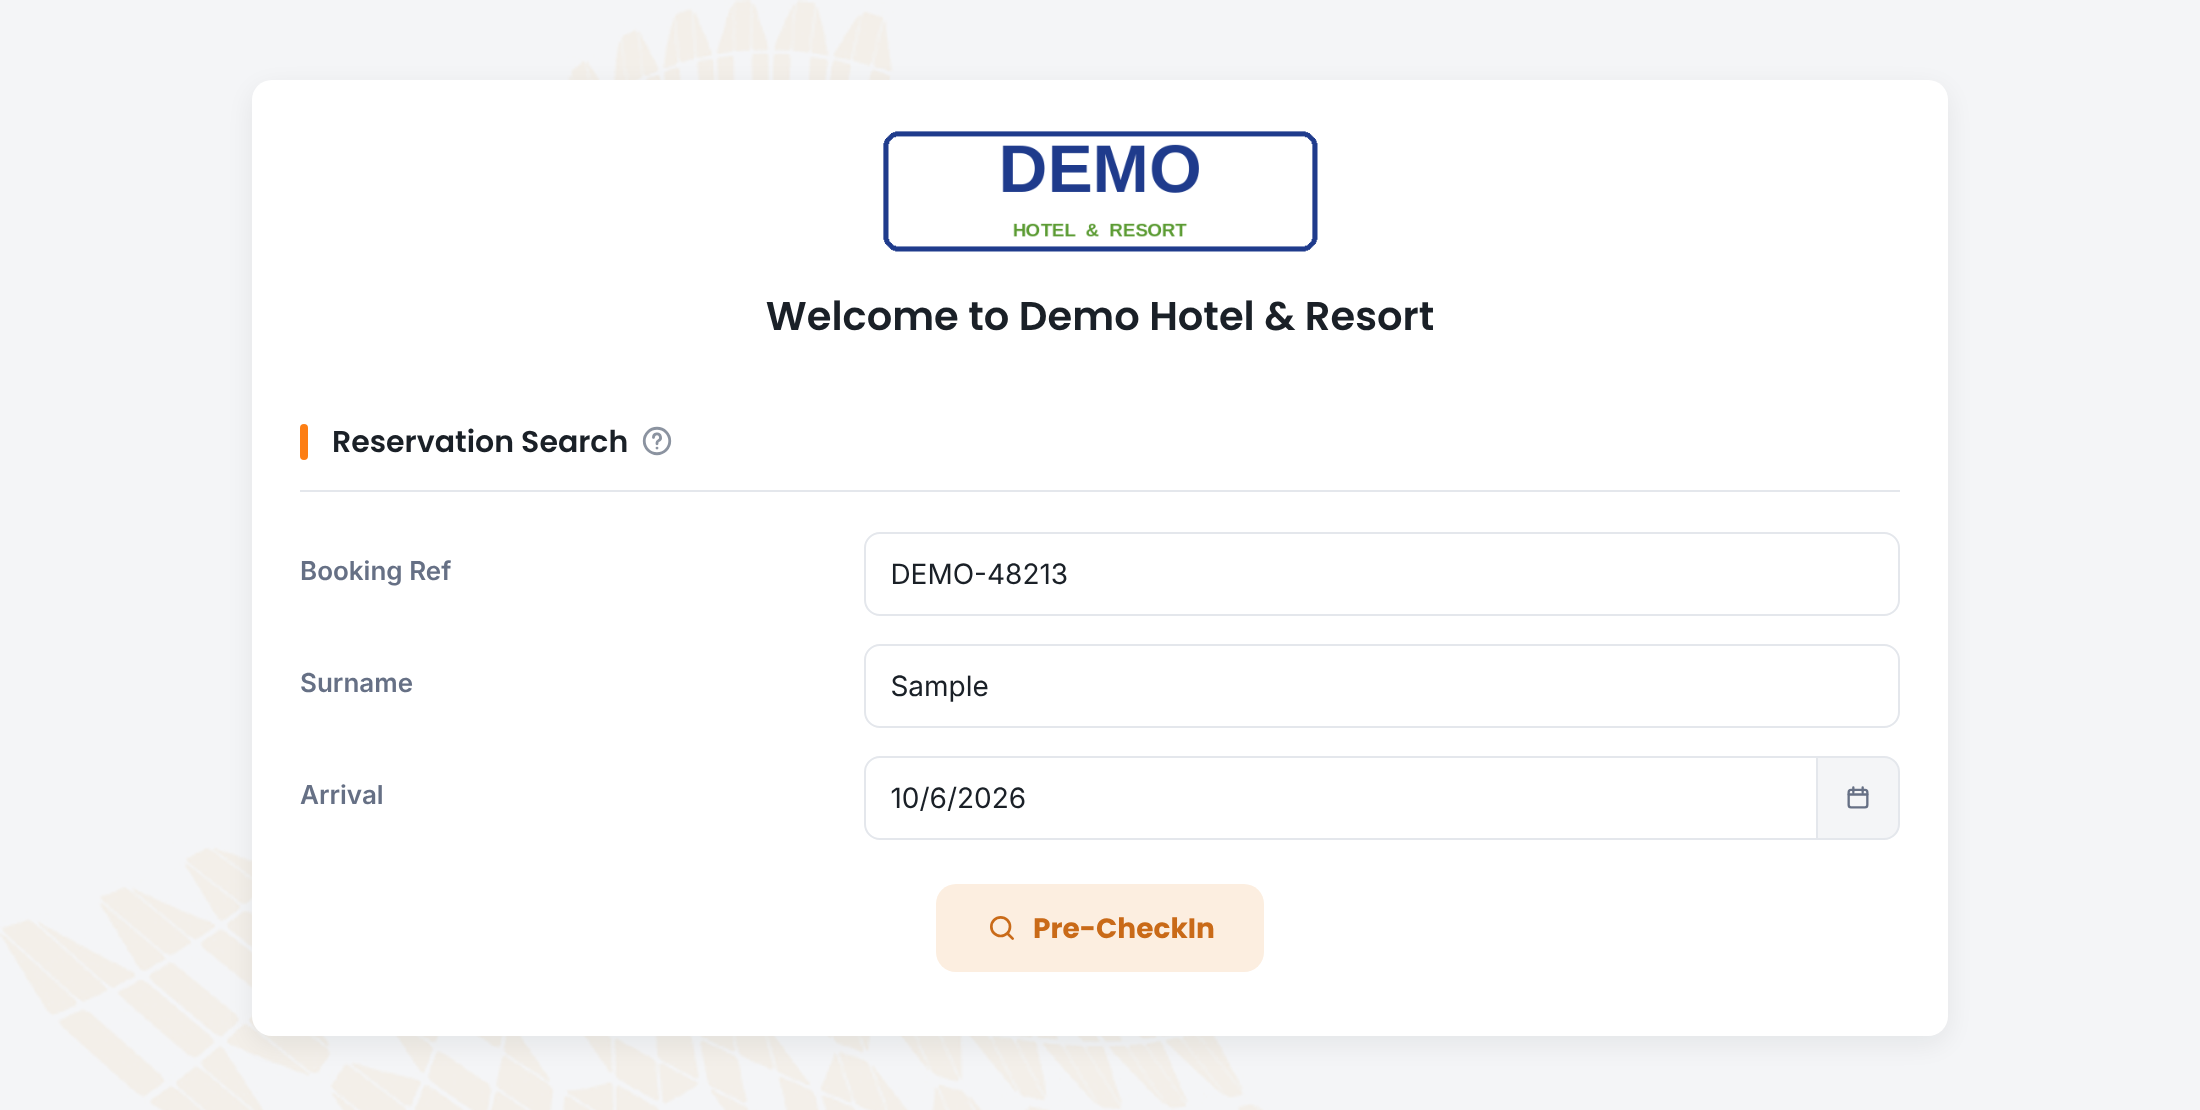
Note: All three details must match the booking. If the guest sees “Please fix below errors!”, check the spelling of the surname and the arrival date with them.
5. Guest details
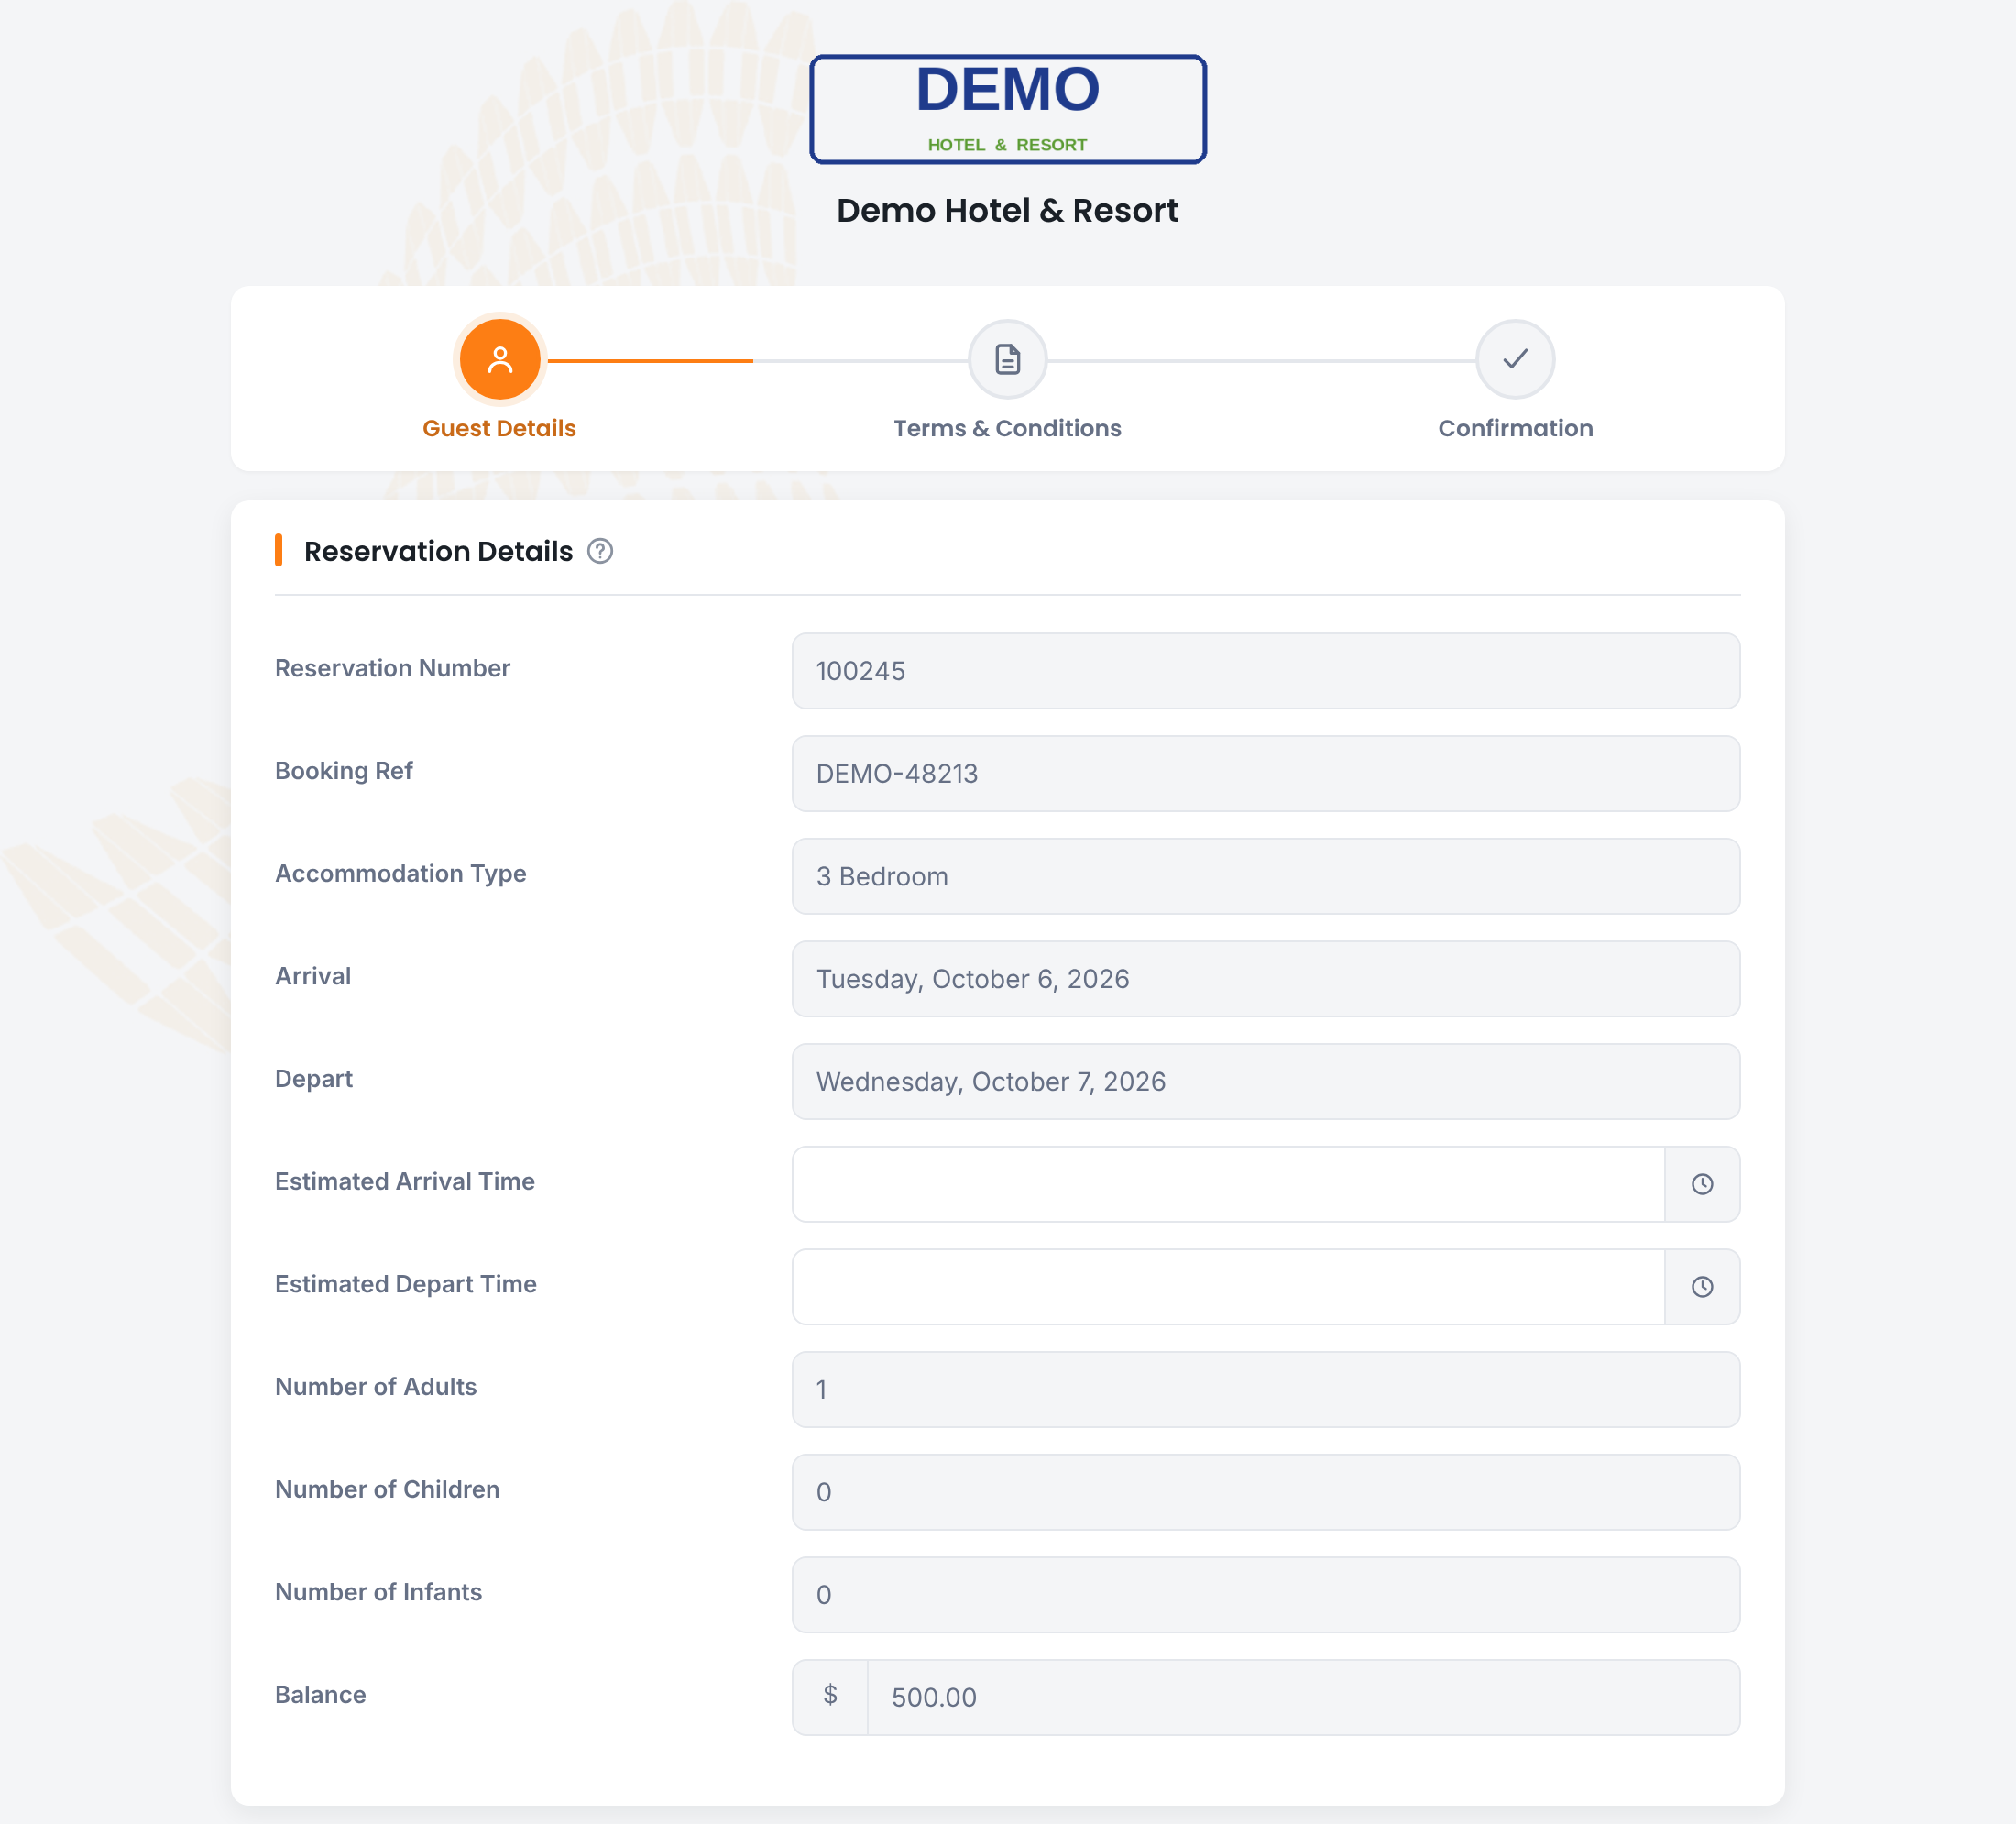
The booking opens on the Guest Details step. The progress bar at the top shows the steps: Guest Details, Terms & Conditions, Payments (only when the hotel takes card details or payments online, see section 9) and Confirmation.
i. Reservation details
The top card shows the booking: reservation number, booking reference, accommodation type, arrival and departure dates, the number of guests and the balance. These are read-only. The guest can add an Estimated Arrival Time and Estimated Depart Time to help the front desk plan.
ii. Guests on the booking
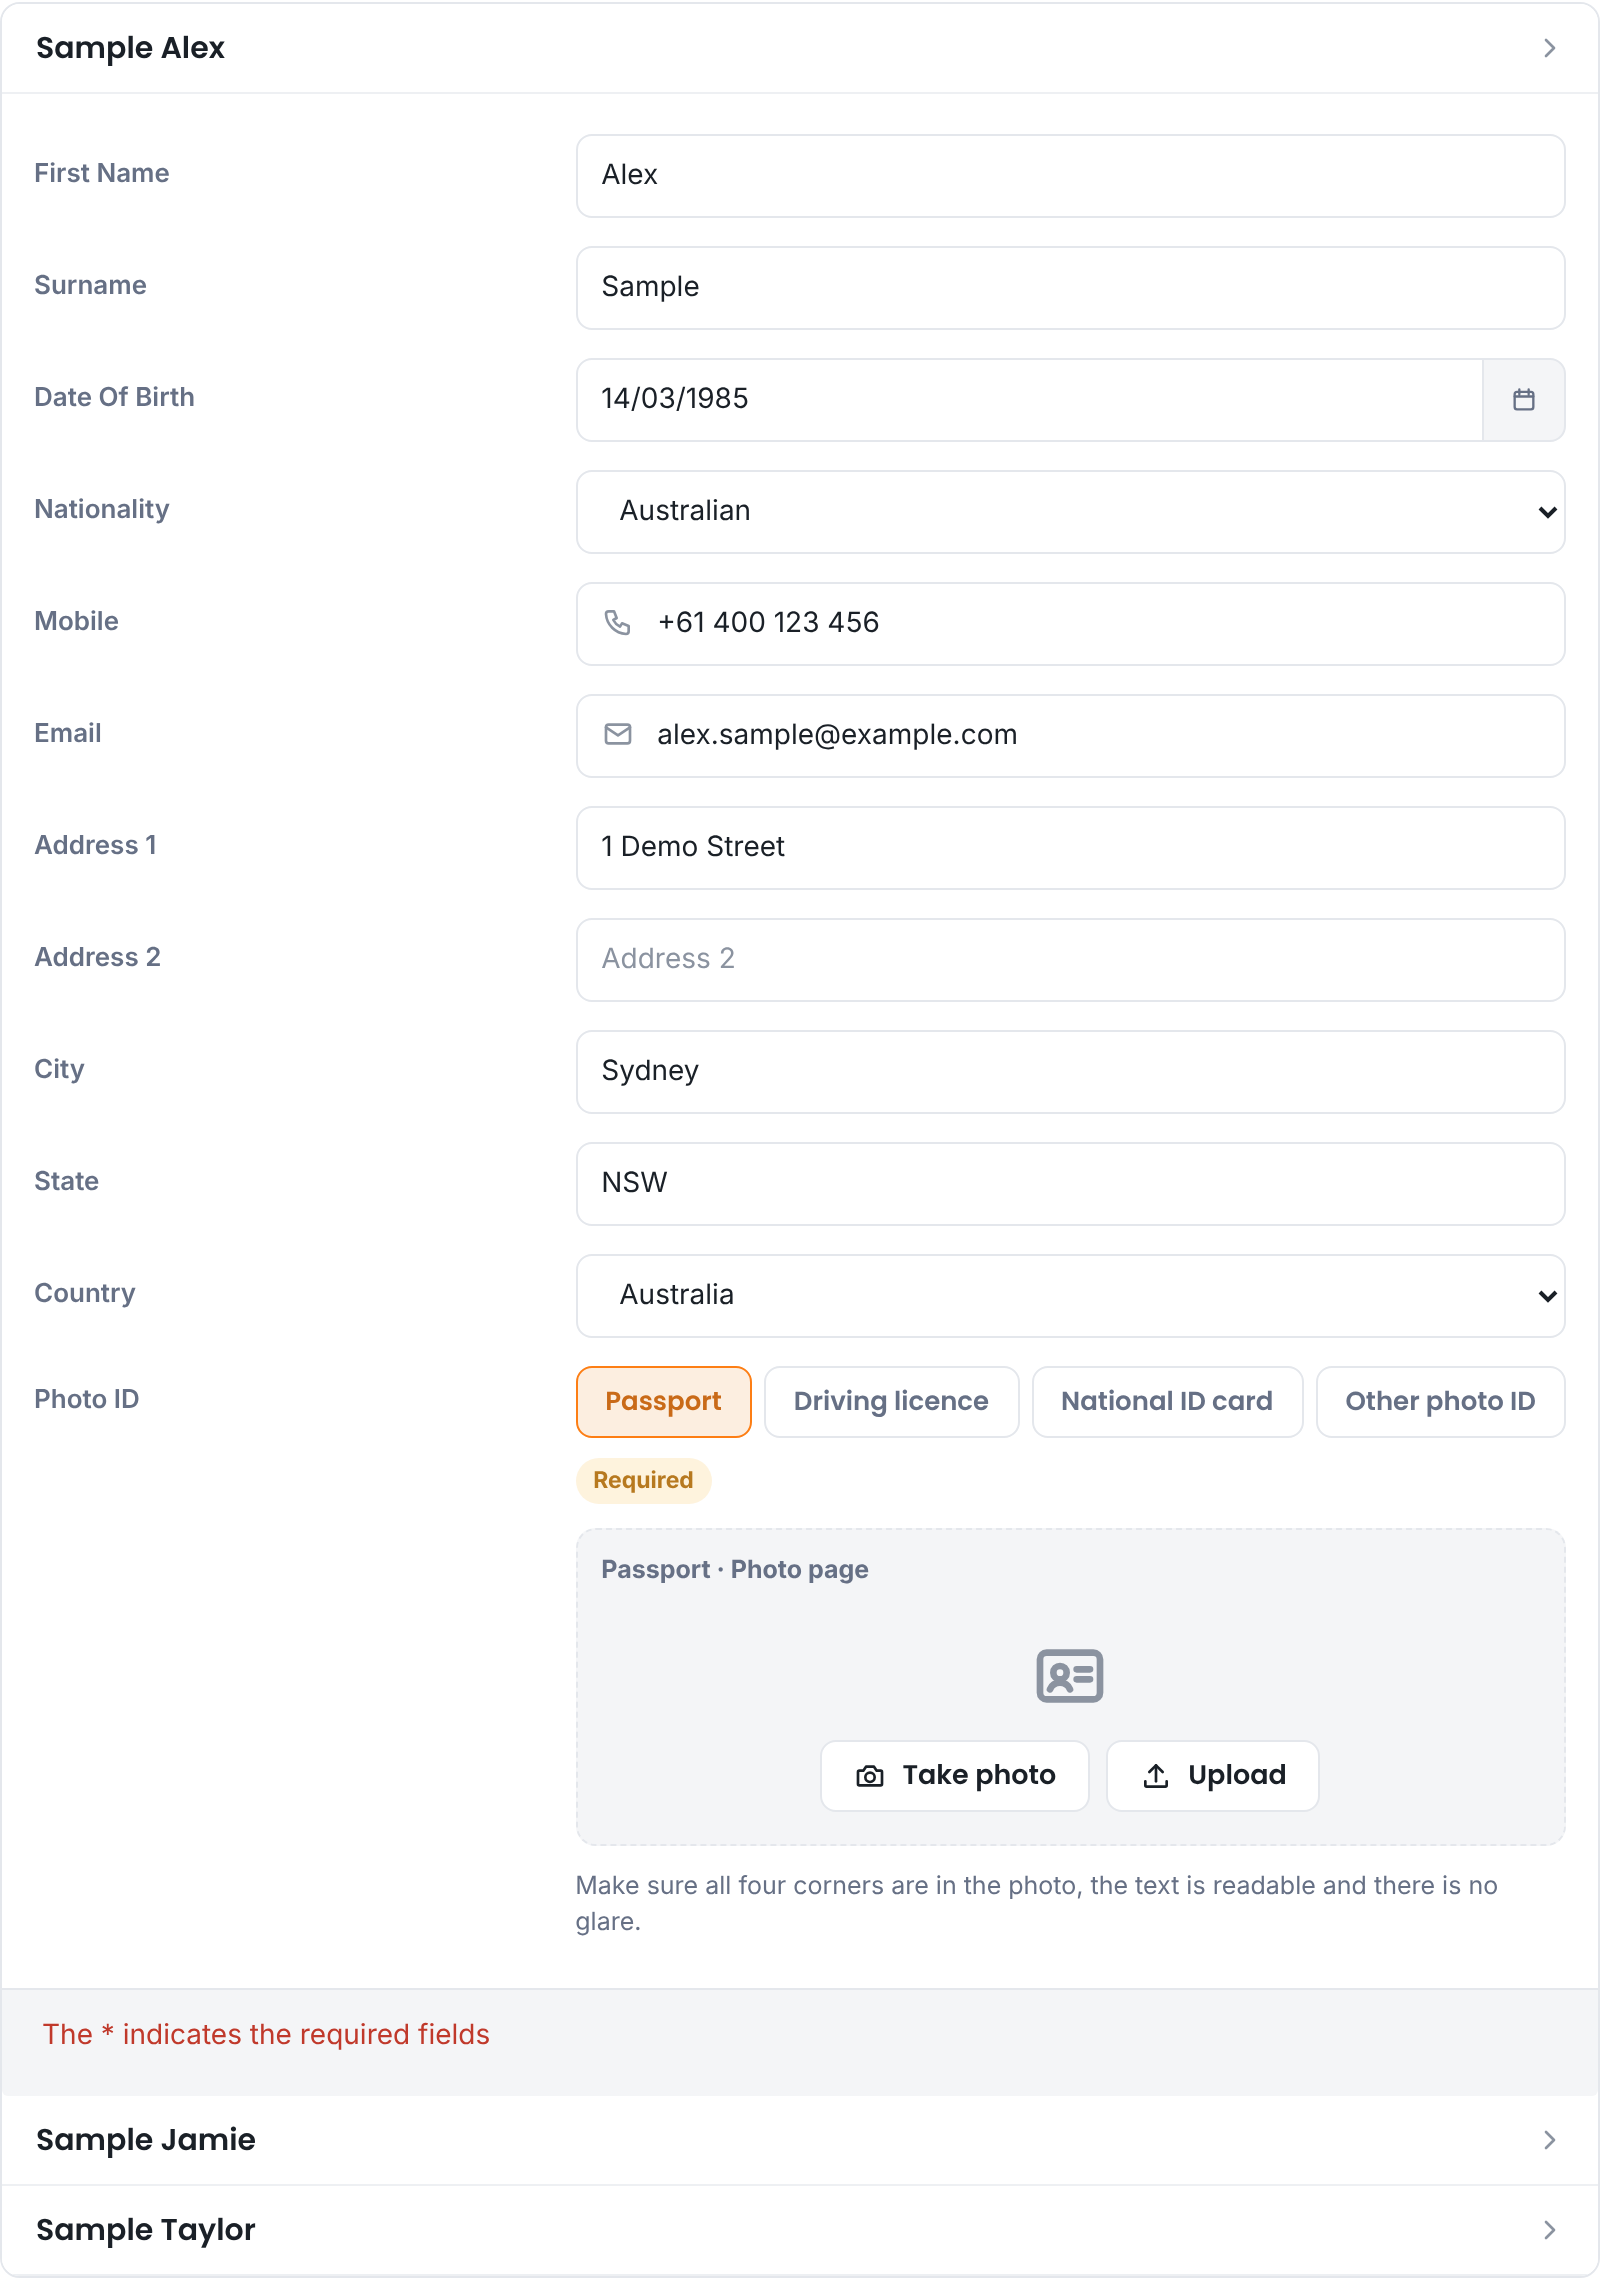
Every guest on the booking is listed by name. The guest selects a name to open that person’s details and fills in or corrects them:
- First name, surname, date of birth and nationality.
- Mobile and email.
- Address, city, state and country.
iii. Date of birth
- Dates in the future cannot be chosen.
- The calendar opens 18 years before today, so adults can find their year quickly.
- Dates show in the guest’s regional format, for example 14/03/1985 in Australia or the UK.
iv. Email address
Email addresses are checked as soon as the guest leaves the field. An address that is not correctly formatted, such as one missing the part after “@”, is outlined in red and the guest cannot continue until it is fixed.
v. Required fields
Fields marked with * must be completed. If something is missing, the portal lists what needs fixing when the guest tries to continue.
6. Photo ID
When the hotel uses photo ID, the guest adds a photo of their identity document in the guest details.
- Choose the document type: Passport, Driving licence, National ID card or Other photo ID. The hotel decides which types are offered.
- Select Take photo to use the phone or tablet camera, or Upload to choose an existing photo.
- The portal checks the photo straight away. It turns sideways or upside-down photos upright, trims the background around the document, and asks for a retake if the photo is blurred, too dark, has glare or cuts off part of the document.
- Use Rotate if the photo still needs turning.
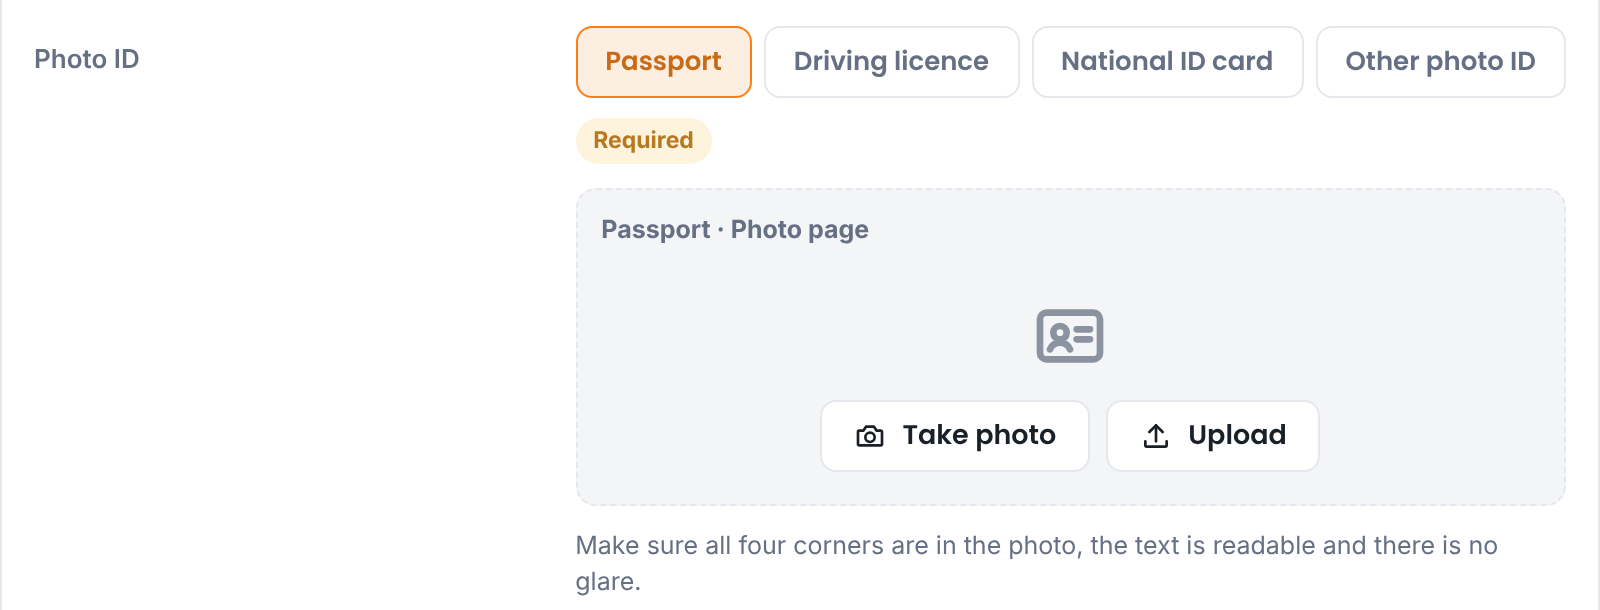
Note: If the guest already has a photo ID on file from an earlier stay, the field shows it is on file and they do not need to add it again.
The hotel can choose whether photo ID is required, and whether it is needed for every guest or only the primary guest (see section 13).
Photos are saved in a compact format so they stay clear to read without taking up unnecessary space in the database.
7. Additional guests
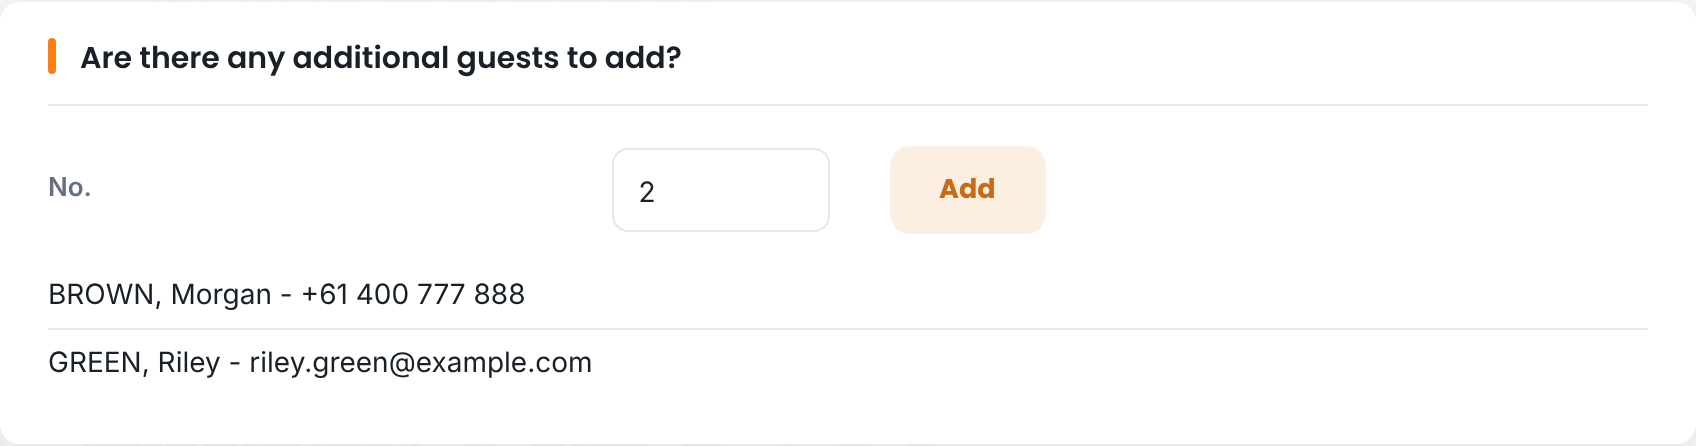
Below the guest list, the portal asks “Are there any additional guests to add?”. This is for people staying who are not already named on the booking.
- Enter the number of additional guests in No.
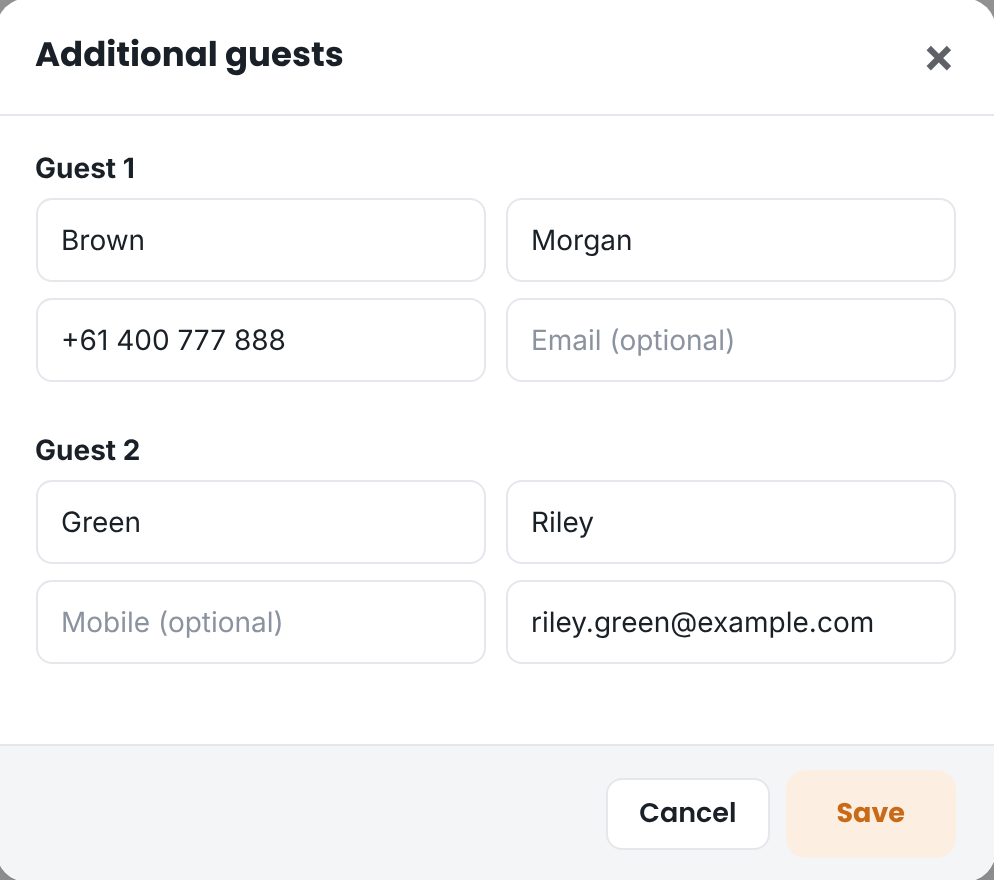
- Select Add. A window opens with one row per guest.
- Enter each guest’s Surname and First Name. Mobile and Email are optional, but are checked if filled in.
- Select Save once every row is complete. The button stays unavailable until then.
The saved names are listed under the question. The guest can select Add again to change them, or set the number back to 0 to remove them.
The names are saved to the booking when the guest updates their details or moves on to the terms and conditions. Section 12 shows how they appear in GuestCentrix.
8. Terms and conditions
When the guest details are complete, the guest selects Update and goto terms & conditions. Their details are saved and the hotel’s terms are shown.
- Read the terms and conditions.
- Tick I have read and accept the Terms & Conditions.
- Sign in the box with a finger, stylus or mouse. Select Clear to start again.
- Check the name shown under the signature. This is the primary guest’s name and updates if they change it on the guest details step.
- Select Update and goto confirmation, or Update and goto payments when the hotel uses online payments.
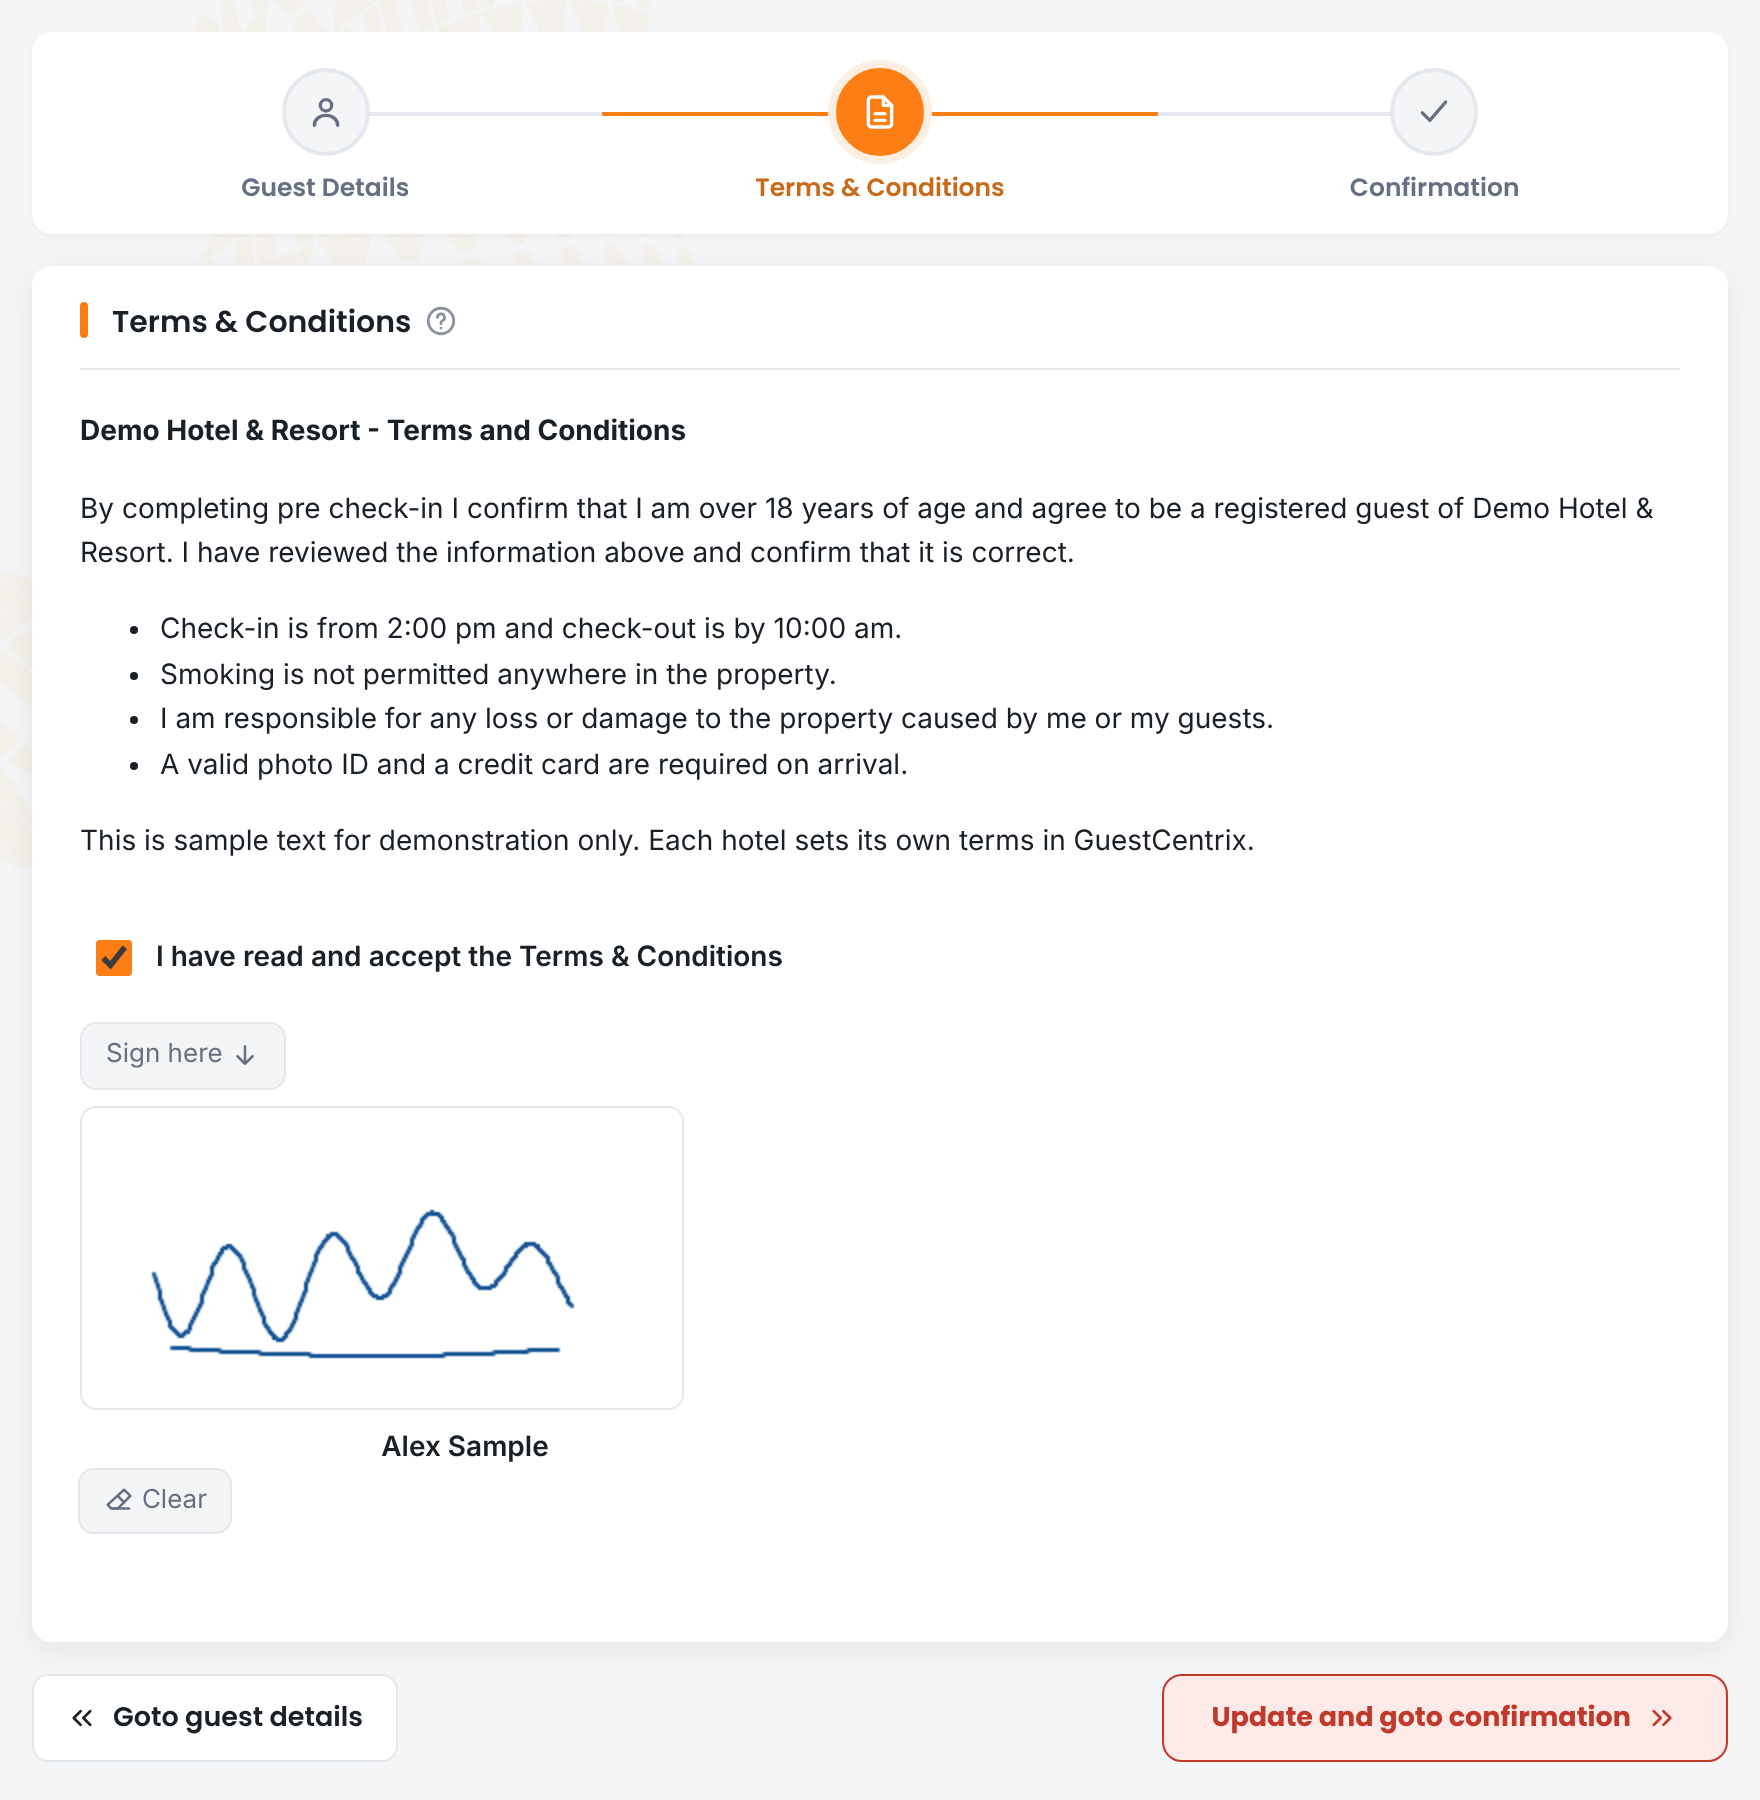
Note: Terms are shown in the guest’s language. One set of terms per language is enough: for example, a single English version is used for guests in the UK, the USA and Australia.
9. Payments, card details and pre-authorisation
When your hotel takes card details or payments online, a Payments step appears after the terms and conditions. The guest reaches it with Update and goto payments. Which parts are shown depends on what your hotel has switched on and what your payment provider supports.
Card details are always entered on the payment provider’s own secure page. The portal and GuestCentrix never see or store the full card number; GuestCentrix keeps a secure card reference (token) on the folio instead.
i. Card on file
Used when the hotel wants a card held against the booking, for example to guarantee the stay or for incidentals.
- Select Enter credit card.
- The guest is taken to the payment provider’s secure page to enter the card.
- When the card is accepted, the guest returns to the portal and the card appears in the Cards list.
ii. Payment
Used when the hotel takes a payment before arrival. The amount due is filled in for the guest, based on the hotel’s rule: either a percentage of the total stay or the cost of the first few nights.
- Check the amount, then select Pay now.
- Choose Use new card to pay with a different card on the secure page, or Use existing card to pay with a card already saved on the booking (select it in the Cards list first).
- When the payment is approved it appears in the Payments list.
iii. Pre-authorisation
A pre-authorisation places a hold on the guest’s card without charging it, for example as a security bond. The amount is filled in from the hotel’s rule: a percentage of the stay, an amount per night or a fixed amount. The guest chooses Use new card or Use existing card in the same way as for a payment. Approved holds appear in the Pre-authorisation list.
iv. Credit limit
If the hotel uses credit limits, the guest can see, and where allowed set, the credit limit for charges to their room. The limit must be more than zero and cannot exceed the maximum set by the hotel.
v. Completing the step
The guest cannot finish pre check-in until everything the hotel requires on this step is done: a card on file, the payment amount and the pre-authorisation amount. If something is outstanding, the portal lists it, for example the amount still to be paid. If a card is declined, the guest sees the reason from the payment provider and can try again or use another card.
Note: Payment features are set up by CMS Hospitality for each property, together with your payment provider. The providers available to the portal include AsiaPay, DirectOne, GMO, Payment Express (Windcave), PayZen, Shift4, SimplePay, Stripe and VeriTrans; not every provider supports every feature.
10. Confirmation
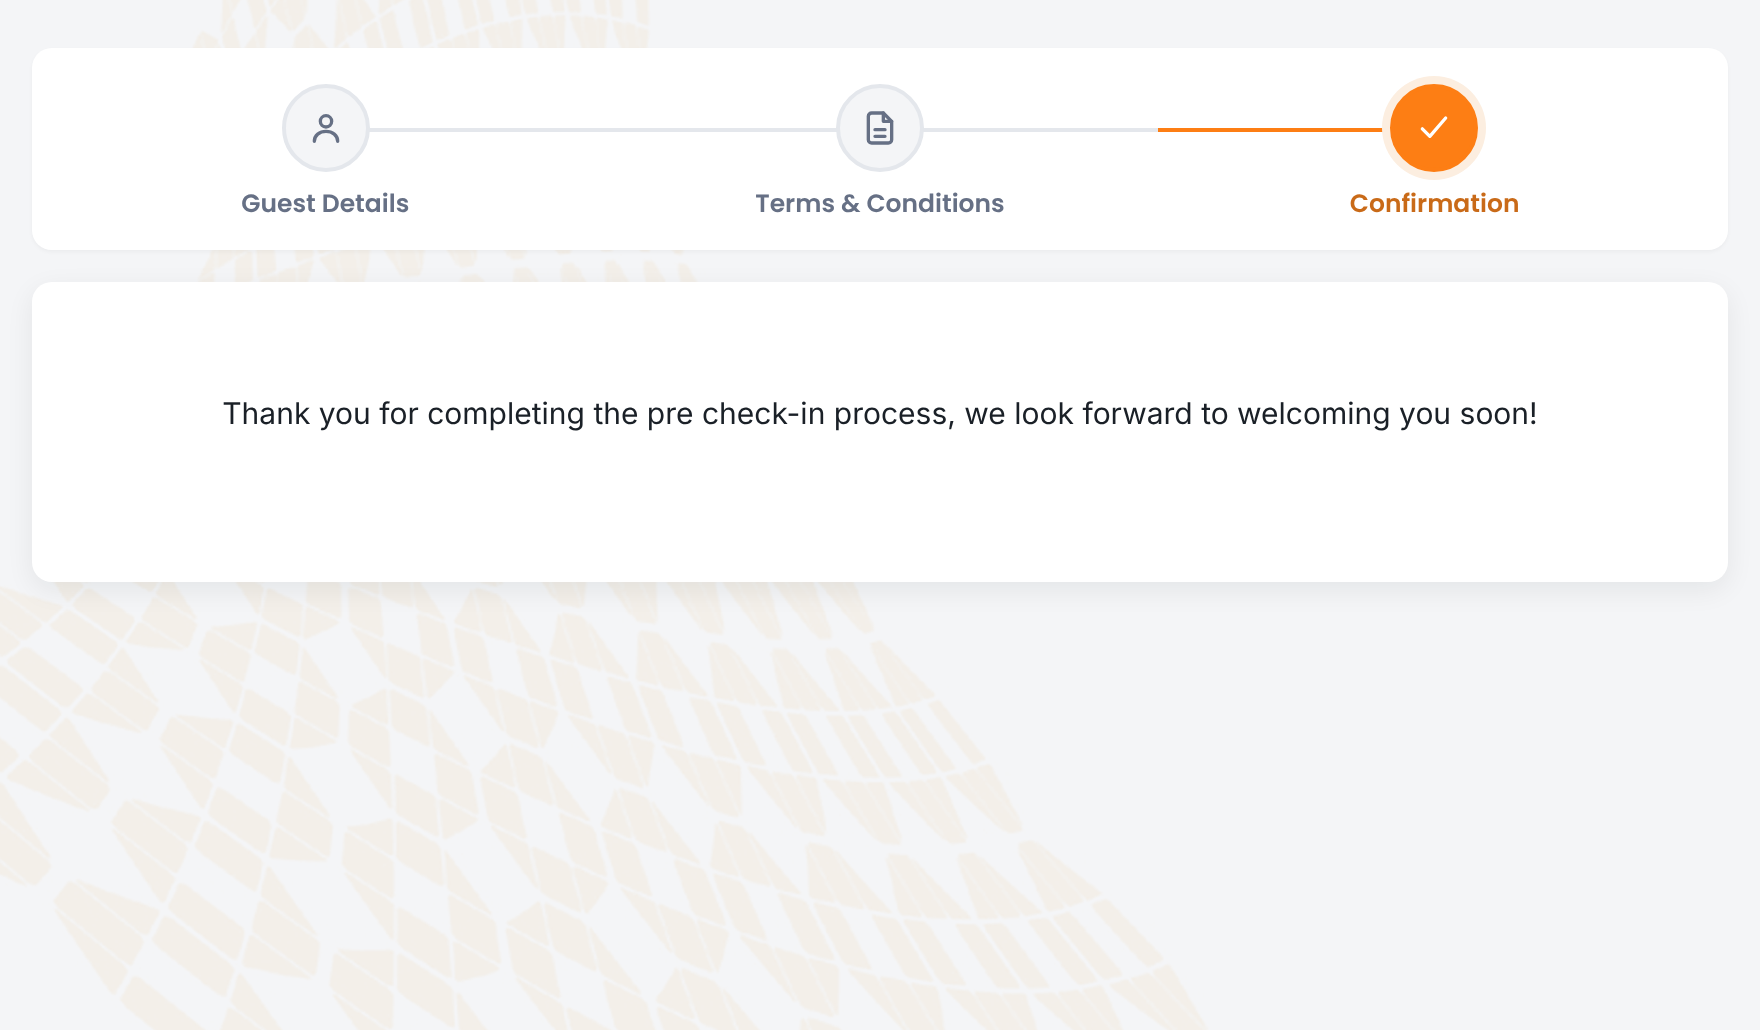
After signing, the guest sees a thank-you message. Their pre check-in is complete and everything is saved in GuestCentrix.
i. Bookings that cannot be pre checked in
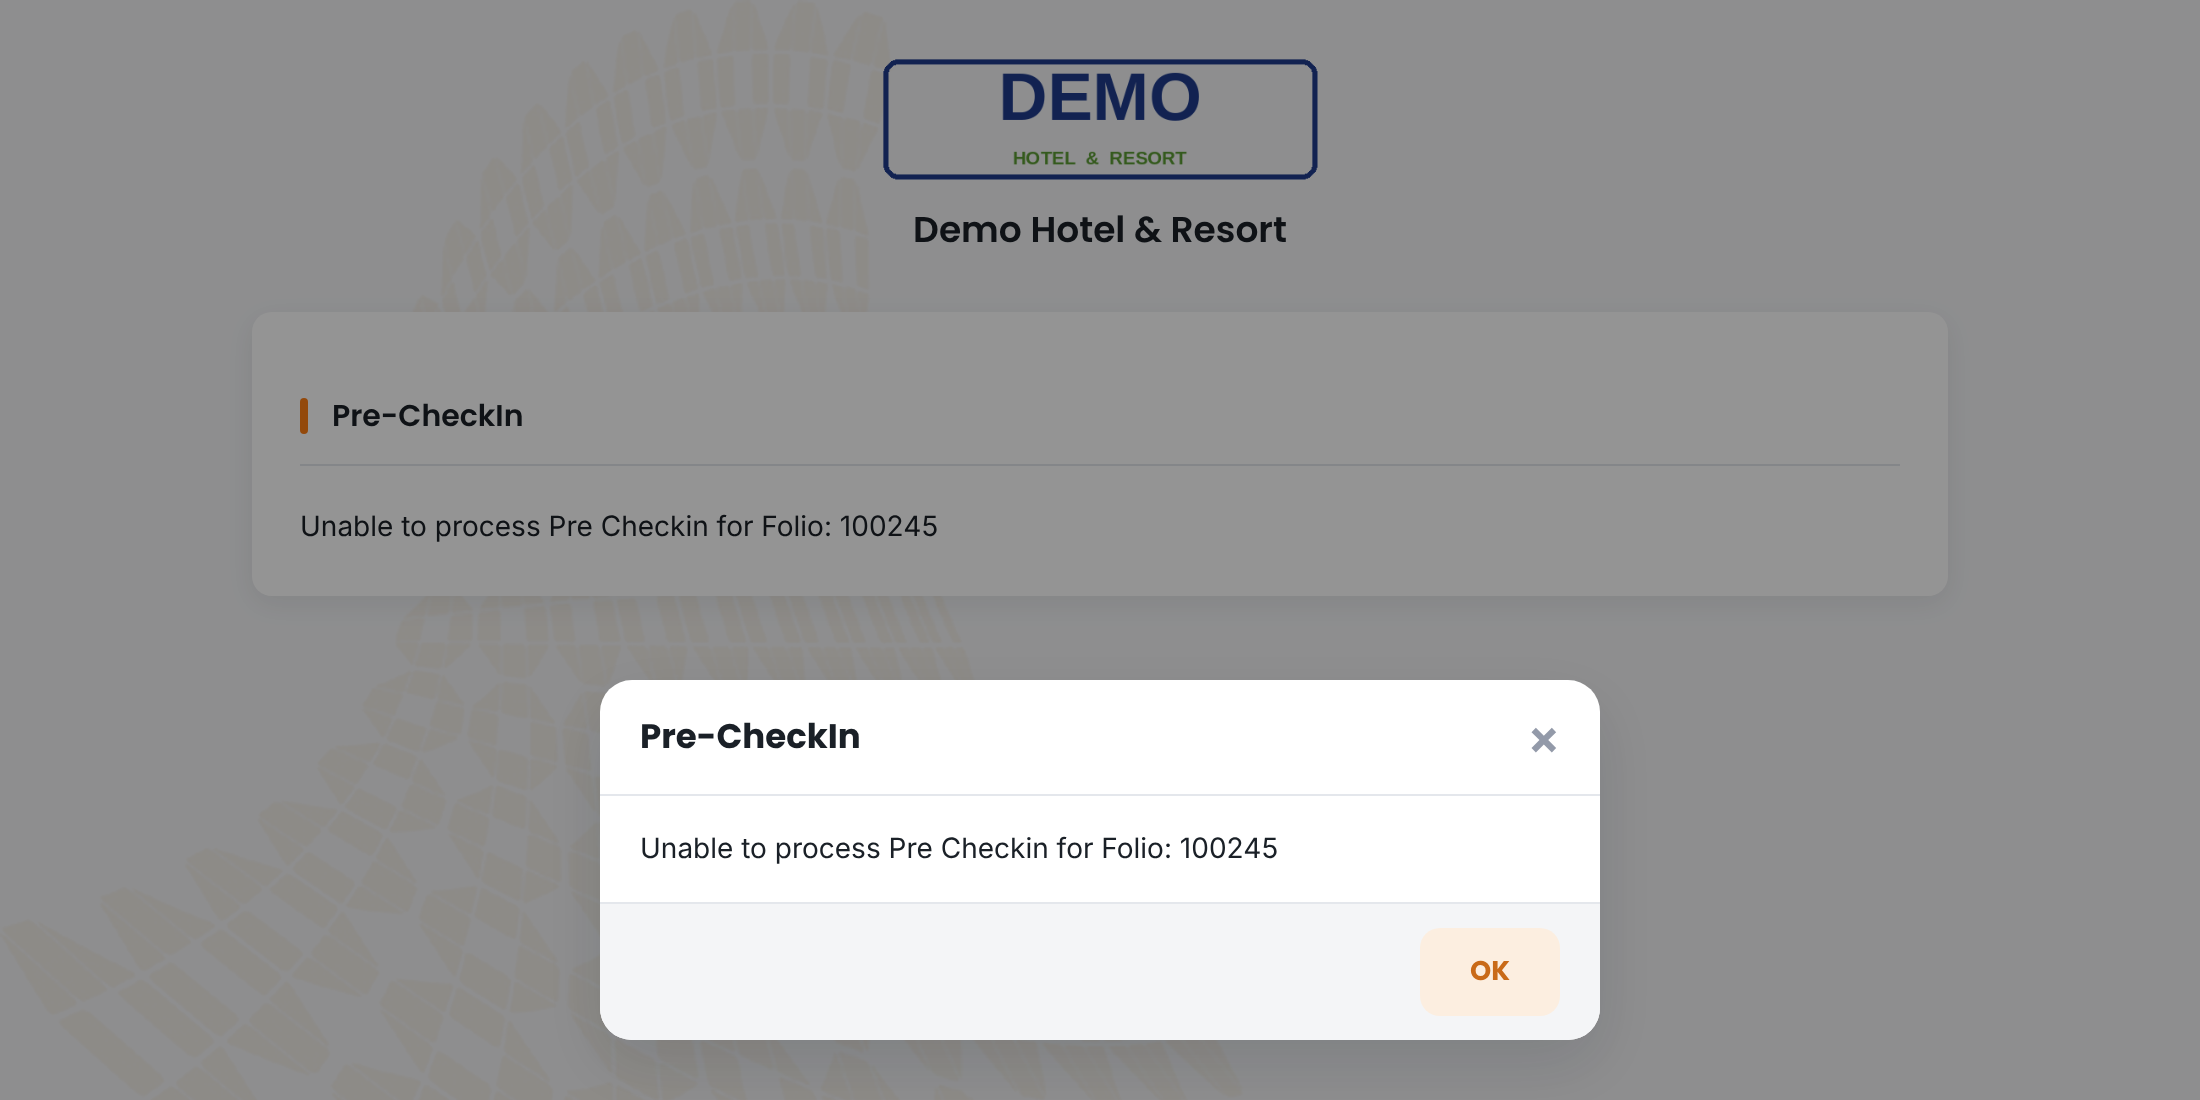
Pre check-in is only available for bookings in the status your hotel allows (normally reserved bookings that have not yet checked in). If a guest opens a link or searches for a booking in any other status, for example one that is cancelled or already checked in, they see the message “Unable to process Pre Checkin for Folio: <folio number>” and the booking does not open.
11. Language, themes and devices
i. Language
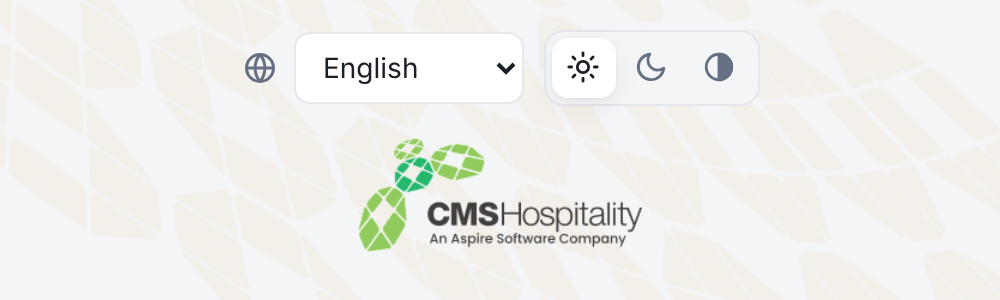
The language picker at the bottom of every page switches the portal between the languages your hotel has set up. Dates, labels, terms and messages all follow the selected language.
ii. Themes
The theme switch next to the language picker offers light, dark and high-contrast themes. The portal remembers the guest’s choice on that device.
iii. Phones and tablets
Every step adjusts to the screen size, so guests can complete pre check-in comfortably on a phone. On phones, Take photo opens the camera for the photo ID.
12. What is saved in GuestCentrix
Item | Where to find it |
|---|---|
Guest details | Each guest’s record on the folio: names, date of birth, nationality, contact details and address. |
Arrival and departure times | The estimated times on the folio. |
Photo ID | The guest’s passport image (Guest > Details > Passport), with the date it was scanned. |
Additional guests | A single line in the folio’s check-in comments. Existing comments are kept, and the line is replaced rather than repeated if the guest changes the list. |
Cards, payments and pre-authorisations | On the folio: saved card references (tokens), approved payments and pre-authorisation holds, as taken through your payment provider. |
Terms and conditions | The folio attachment “Folio_<number>_Precheckin_Terms_Conditions_Signature”. It holds either the signature only or the full signed terms and conditions screen, depending on the hotel’s setting. |
i. Check-in comments line
Additional guests are written to the check-in comments in this format, with mobile and email included only when the guest gave them:
Pre check-in - additional guests (2): BROWN, Morgan - Mob: +61 400 777 888; GREEN, Riley - Email: [email protected]If staff later update the list from GHub Guest Registration, the same line is replaced and starts “Guest Registration - additional guests”, so a booking only ever has one additional-guests line.
ii. Signed terms and conditions
With the full-screen option switched on, the attachment shows the hotel logo and name, the other guests and additional guests on the booking, the terms, the ticked acceptance, the signature and the primary guest’s name.
13. Settings
These settings are held in the portal’s configuration and are changed by your system administrator or CMS Hospitality support. Each is set to Y (on) or N (off) unless stated otherwise.
Setting | Description |
|---|---|
| Y shows “Are there any additional guests to add?” on the guest details step and saves the names to the check-in comments. N hides it. |
| Y shows the photo ID field and asks guests to add their photo ID before continuing. N hides photo ID. |
| Y asks for photo ID from the primary guest only. N asks every guest on the booking. |
| Y offers Passport as a photo ID type. |
| Y offers Driving licence as a photo ID type. |
| Y offers National ID card as a photo ID type. |
| Y offers Other photo ID. If every type is N, the photo ID field is not shown. If only one is Y, the type buttons are hidden. |
| Live saves photo IDs to GuestCentrix. Demo checks photos but does not store them, for training and demonstrations. |
| Y saves the whole signed terms and conditions screen as the folio attachment. N saves the signature only. The signature itself is always saved. |
| Y uses the guest’s browser region for dates and regional settings (for example English (UK)), falling back to the language’s general setting if that region is not set up. N uses the standard regional setting for the language. |
| The booking statuses that can be pre checked in, as a comma-separated list of status numbers. The default 1 allows reserved bookings only. |
| Y hides the CMS Hospitality / GuestCentrix logo and background pattern for a white-labelled portal. |
Note: Changes to these settings take effect immediately. Terms and conditions text, the confirmation message and other wording are maintained in GuestCentrix by language. Payment, card, pre-authorisation and credit limit options are part of the property’s Pre Check-In configuration in GuestCentrix and are set up by CMS Hospitality (section 9).
14. Frequently asked questions
i. The guest cannot find their booking
Where possible, resend the guest’s personal pre check-in link (PURL) from GuestCentrix EMS, which opens the booking without a search. Otherwise, check that the booking reference, surname and arrival date match the booking exactly. Bookings in a status that cannot be pre checked in show the “Unable to process Pre Checkin” message instead (section 10).
ii. The guest’s photo is rejected
Ask the guest to place the document on a plain, dark surface in good light, with all four corners in view and no glare, then take the photo again. Uploading a photo taken with the phone’s own camera app also works well.
iii. The guest cannot continue from guest details
Look for fields outlined in red: usually a missing required field, an incorrectly formatted email address, a missing photo ID, or additional guests that have been counted but not entered. If the number of additional guests is wrong, change it or set it to 0.
iv. The terms and conditions are blank
Terms are looked up for the guest’s language. Make sure terms are set up and in use for each language your portal offers.
v. The guest cannot finish the Payments step
Check the message on screen: the guest may still need to add a card, pay the amount shown or complete the pre-authorisation. If a card is declined, ask them to try another card or contact their bank. Approved payments and holds show in the lists on the Payments step and on the folio in GuestCentrix.
vi. Where are the additional guests?
They are in the folio’s check-in comments in GuestCentrix, on a line starting “Pre check-in - additional guests”.
GuestCentrix PreCheckIn User Guide · Version 7.4.2 · 9 October 2026